Microblogging on iOS with Jekyll using `Working Copy.app` and `Workflow.app`
Editor’s Note: This article is outdated and may no longer be relevant. The microblog feature on this site has since been removed.
This website is generated from Markdown using Jekyll and GitHub Pages, which takes a Git repository and feeds it into a static site generator. This approach has numerous advantages which make management and maintenance of this site cheap and simple, but it also has limitations compared to other blogging platforms, especially in terms of post creation. To overcome this shortcoming and facilitate quick posts from my phone, I automated the process of posting using a combination of Workflow.app(App Store Link [Free]) and Working Copy.app(App Store Link [$14.99]).
![]()
In order to publish a post using Jekyll:
- A Markdown (or Textile or HTML) file is created in a
_postsdirectory - Any images or other resources referenced by the post are saved to the
assetsdirectory - The new post file and any associated assets are committed to the Git repository
- The commit is pushed to the remote Git server up on GitHub
- The magic unicorns in the sky will ingest the content to produce a static file directory, which they generously serve for free (within limits)
Git on iOS

It is possible to accomplish all of this on iOS using the awesome Working Copy.app by Anders Borum, which is an outstanding Git client for iPhone/iPad with file editing and support for iOS inter-app communication using x-callback-url. You will need unlock the full functionality of the app with the one-time In-App Purchase (or buy the Enterprise Version which is already unlocked) in order to push commits to Git remotes.
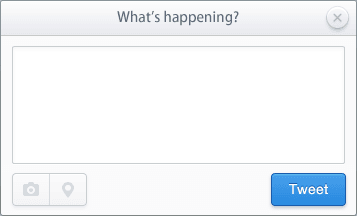
The multi-step process of creating and deploying a new post manually can be somewhat cumbersome and tedious, especially for microblogging when I’m out and about, which typically involves a short bit of text and an optional photo or video. For these “micro”-posts, I would prefer a streamlined interface with minimal input similar to Twitter’s tweet UI:
Automation on iOS
Thanks to a clever automation tool for iOS called Workflow.app, it is possible to create a reasonable facsimile of this simple interface for typing a message and attaching a media file, which get run through the workflow to create a post, commit it, and deploy it to the remote server.
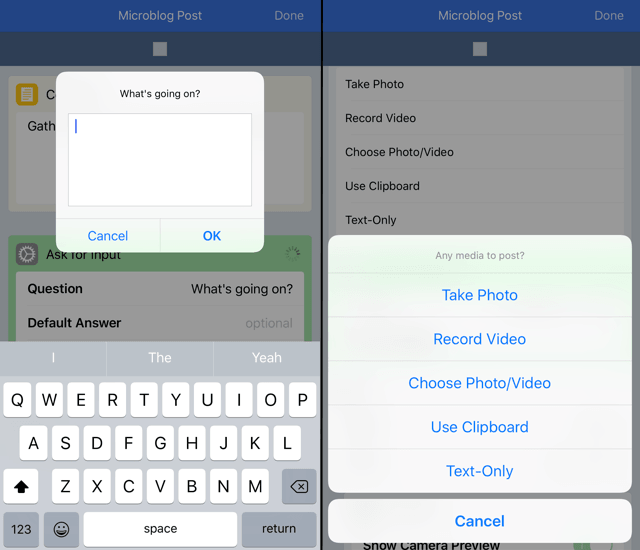
Sure, it’s not exactly pretty, but it gets the job done without ever opening Xcode.
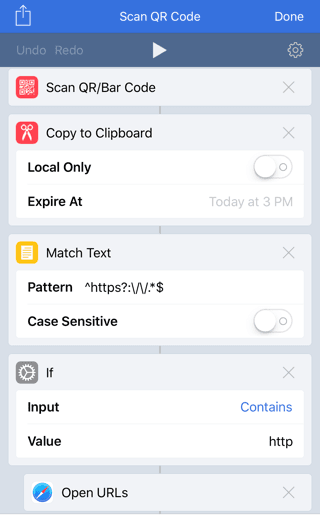
Workflow.app allows you to string together “action bubbles” to create scripts. For example, here’s a workflow that scans a QR code using the camera, copies the parsed text to the clipboard, and checks to see if it’s a web address, opening the URL in Safari if so:
There are a ton of built-in actions, plus the ability to reach out to other apps using x-callback-url or even hit web APIs. Working Copy.app does not have any built-in actions for Workflow.app, but it offers a wide selection of callback URL schemes for interacting with the app through automation.
Building the workflow
Here’s a breakdown of the entire workflow:
Configuration
- Define the repository name to manipulate with
Working Copy.app - Define the
Working Copy.appcallback security key - Define the base URL of the final deployed page
Gathering information
- Ask for text input to populate the post body
- Define the post filename based on the current date/time
- Define the post’s front-matter based on the current date/time
- Define the base filename for any post attachments based on the current date/time
- Ask for any associated media from the camera, saved photos, or the clipboard:
- Take Photo: Run
Take Photoaction, capturing a single photograph - Record Video: Run
Take Videoaction, capturing a video using the camera - Choose Photo/Video: Run
Select Photosaction, capturing a single image or video item from Saved Photos - Use Clipboard: Run
Get Clipboardaction, capturing the clipboard contents - Text-Only: Do nothing
- Take Photo: Run
Git housekeeping
- To ensure that the post’s commit will push cleanly, pull the latest commits from the Git remote with
Working Copy.app
Media handling
- Inspect the type of media to attach:
- Image/Video:
- Define the attachment’s filename
- Copy the attachment file to the clipboard (so that it can be transferred to
Working Copy.app) - Write the attachment file to the Git repository staging area with
Working Copy.app - Further inspect the media type of the attachment:
- Video:
- Make an animated GIF of the video
- Copy the GIF to the clipboard (so that it can be transferred to
Working Copy.app) - Define the GIF’s filename
- Write the GIF file to the Git repository staging area with
Working Copy.app - Define additional post front-matter to declare the GIF as the post’s canonical image
- Define the Markdown text that embeds the GIF into the post and links to the original video
- Image:
- Make a scaled version of the image for embedding
- Copy the scaled image to the clipboard (so that it can be transferred to
Working Copy.app) - Write the scaled image file to the Git repository staging area with
Working Copy.app - Define additional post front-matter to declare the original image as the post’s canonical image
- Define the Markdown text that embeds the scaled image into the post and links to the original image
- Video:
- Define the number of files to commit
- Other/None:
- Define an empty text value for the additional post front-matter
- Define an empty text value for the attachment embedding
- Define the number of files to commit
- Image/Video:
Post creation
- Assemble the post file contents from previously-defined variables:
- front-matter
- user-inputted post message
- optional inline image reference
- Write the post file contents to the Git repository staging area with
Working Copy.app
Git finalization
- Define a hard-coded commit message
- Create a commit from all of the post files in staging to the Git repository with
Working Copy.app - Push the commit to the Git remote server with
Working Copy.app
You can see this workflow in action to get a feel for the posting process:
Future concerns
There are a few details of this Jekyll-based microblogging endeavor that I will have to solve for at some point in the future:
- The slowest part of this process is the push to the remote. Most of this problem can be blamed on my slow upload speed, but the situation could be improved by optimizing or not-including the “original media”.
- The
jekyll-paginateplugin does not support filtering by category, so there is currently no built-in way of paginating these micro-posts separately from long-form posts. GitHub Pages does not support custom plugins. - GitHub has a maximum file size of 100MB, so long videos cannot be posted. A viable alternative is to post them to YouTube and link/embed them in a post.
- GitHub has a recommended repository size limit of 1GB. Eventually the photos and videos will exhaust this limit. I may have to optimize the “original media” that is linked in the post so that it is not so massively huge. For now, I’ve got plenty of headroom.
Wrapping up
If you want to use this workflow for your own microblogging with Jekyll, or modify it for other purposes, you can download a copy of the workflow and import it into Workflow.app. During the import process, you will be asked to configure the Working Copy.app callback key and repository name, as well as the GitHub Pages domain name for your site.
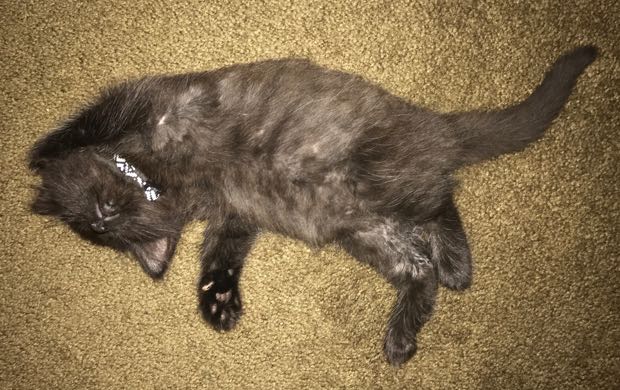
I hope this was helpful and/or interesting. I made this workflow because we recently got a new kitten around the house and I wanted to optimize my ability to quickly share all of her antics, as well as make quick posts about all of the other goings-on around the farm.
Thanks for reading.